
| ▲ Electronics |
The need for this came about when I was experimenting with high-speed gate drivers for an induction heater. The gate driver chips I finally settled on using were the UCC37322 from Texas Instruments. These are great drivers, 9A peak current and around a 20ns rise/fall time with 10nF load. The chips are available in three different packages - DIP-8, SOIC-8 and "PowerPAD™", with maximum power dissipations of 0.35W, 0.65W, and 3W respectively. Because of what I was driving, I needed the power handling capability of the PowerPAD™ package.
The PowerPAD™ package is similar to MSOP-8, but with a tin-plated heatsink area on the underside of the IC which is thermally connected to the die inside (this is what gives it its high power dissipation capacity). Normally, vias are placed under the IC to carry heat away from the die to the opposite side of the PCB. However, soldering this is impossible by hand (well, it would be possible if you had a board with proper plated-through vias, but home-made boards rarely, if ever, have these). So, I came up with a little heatsink made from copper foil which is first soldered to the back of the IC, then soldered to the PCB. All of this can be done by hand, and it offers at least as much heatsinking capability as the via method.
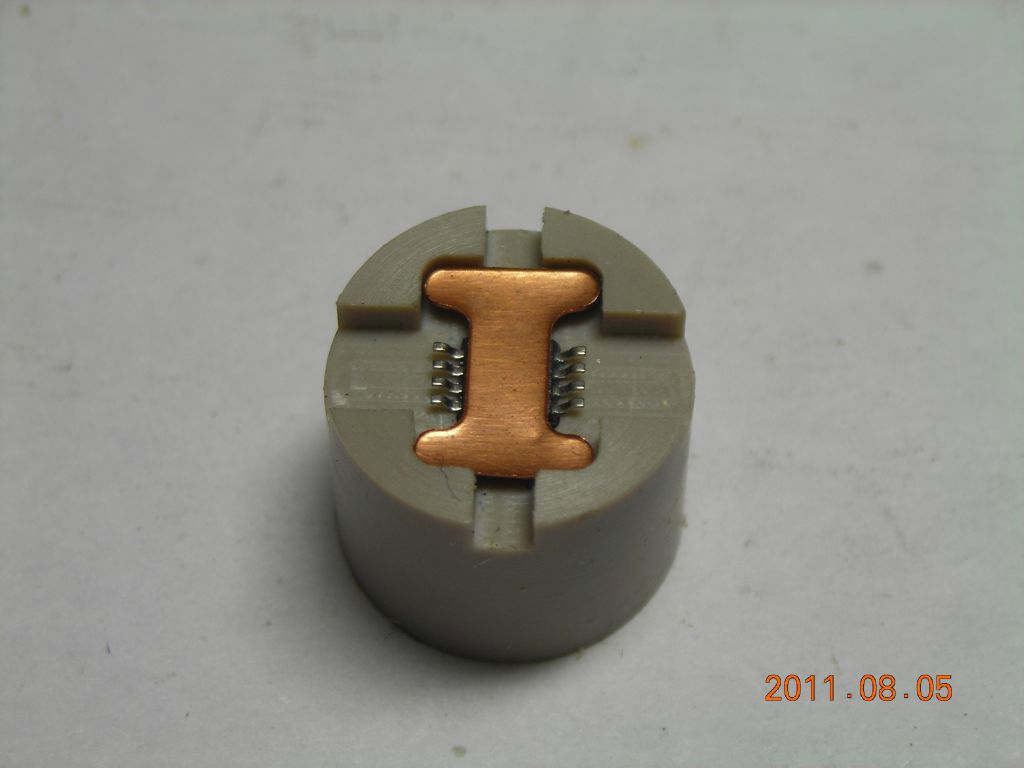
The pictures below should be pretty self-explanatory. I made a punch/die set to stamp out the heatsinks, and a little holder machined from PEEK (heat resistant) to align the IC and heatsink when soldering. The IC is placed bottom-up in the PEEK holder and a small blob of solder placed on the exposed underside. The heatsink is then placed on top and heated with a soldering iron to melt the underlying solder and attach it to the IC. The IC+heatsink is then removed and soldered to the board as normal. The heatsink inevitably raises the IC away from the PCB slightly, but this can be reduced by flattening the heatsink first (to remove the hollowness produced by punching) and by pressing the IC legs down once it is in place on the board.
A PDF drawing of the heatsink is available here. Material is 0.1mm thick copper foil. Note the tiny size of the IC - only around 3mm square!
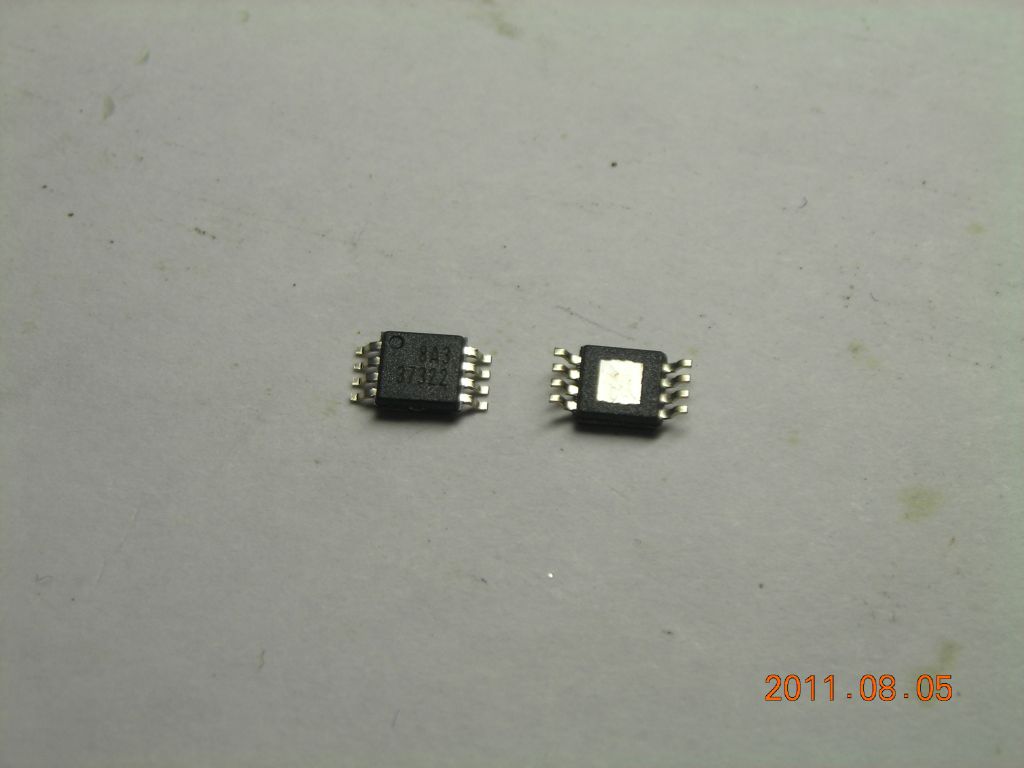 Top and bottom views of IC showing thermal pad |
 Die machined from 1/8" gauge plate |
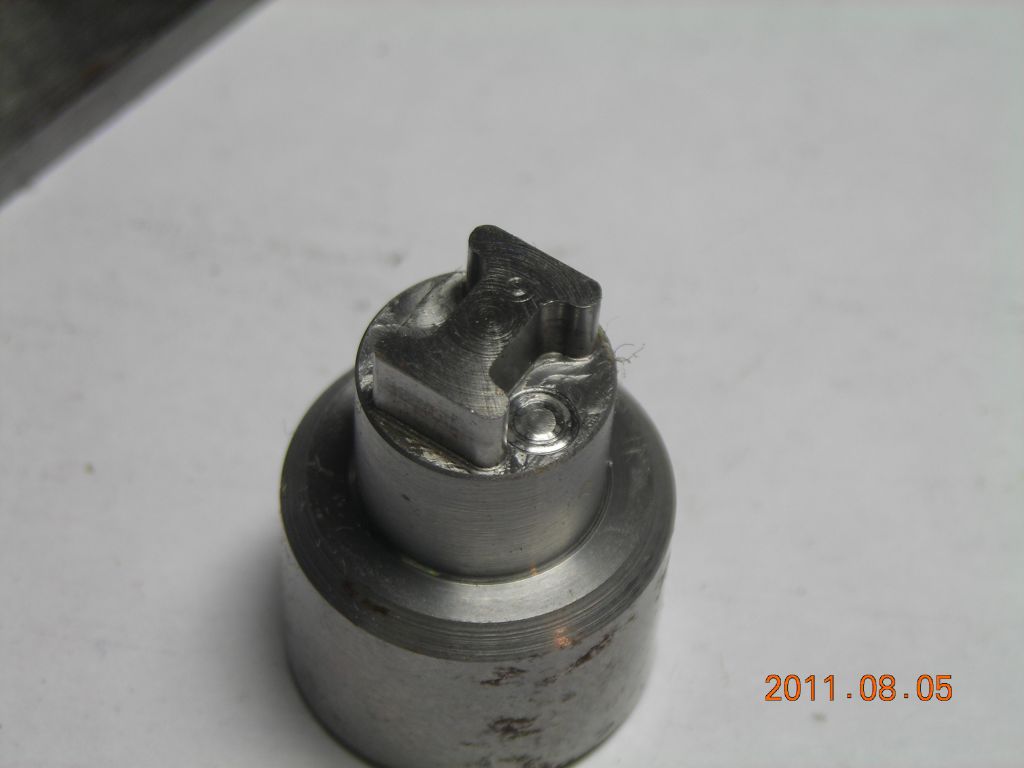 Punch machined from silver steel rod |
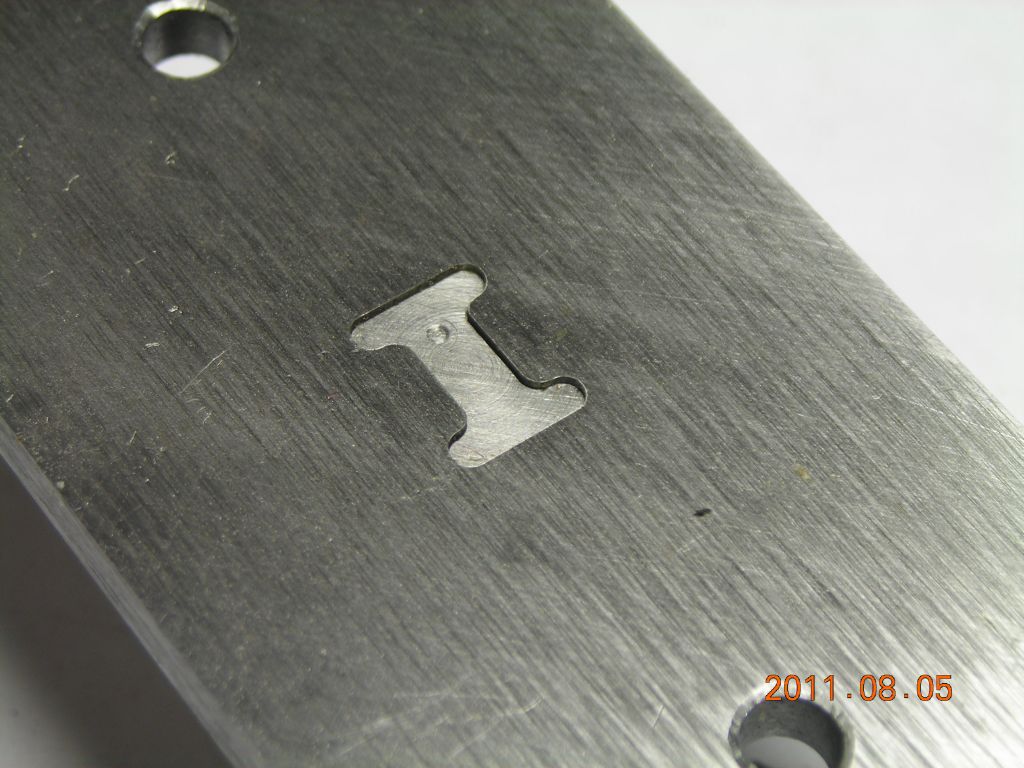 Shows the close fit of punch and die |
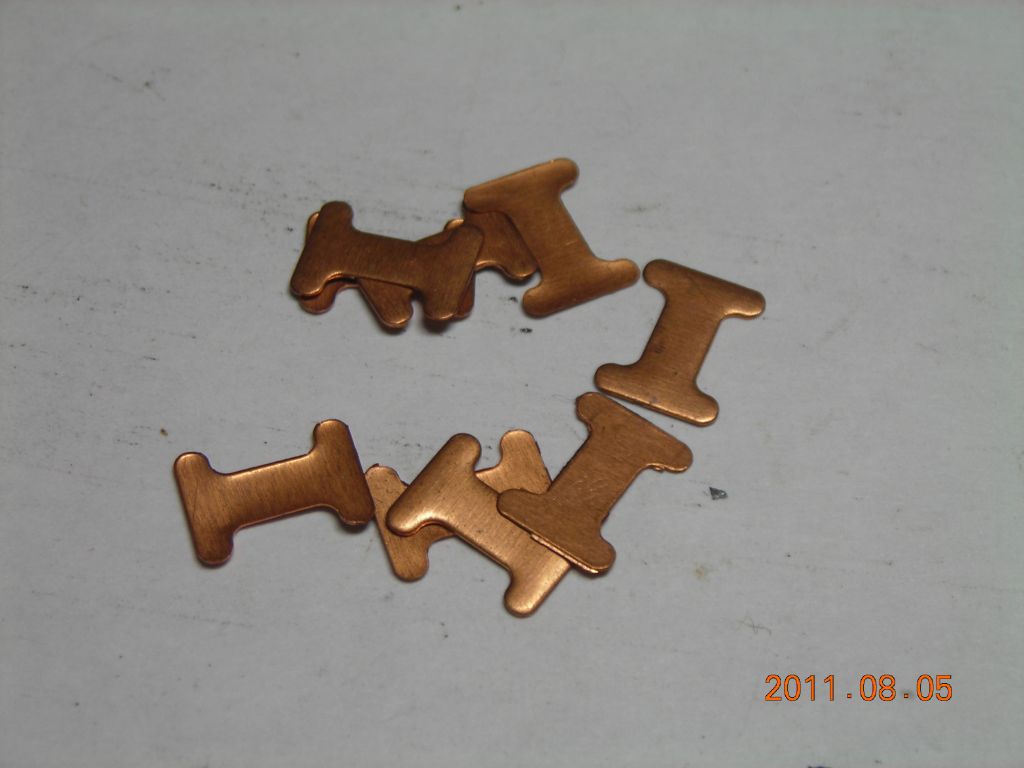 Lots of heatsinks punched from 0.1mm copper foil |
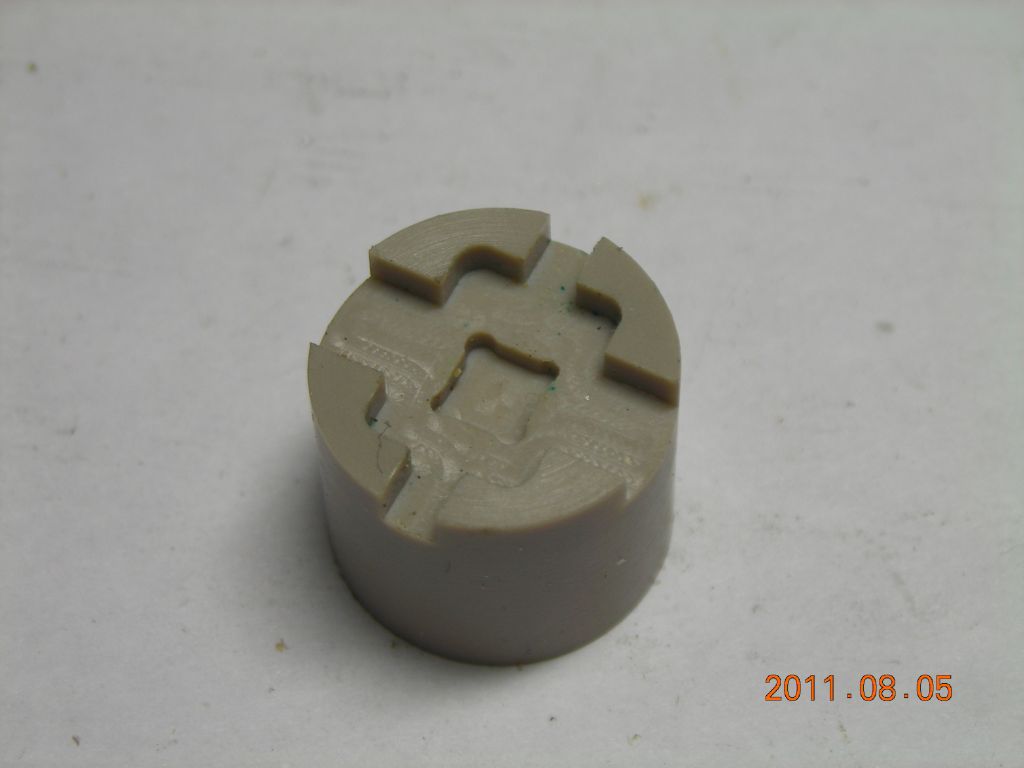 IC holder machined from PEEK |
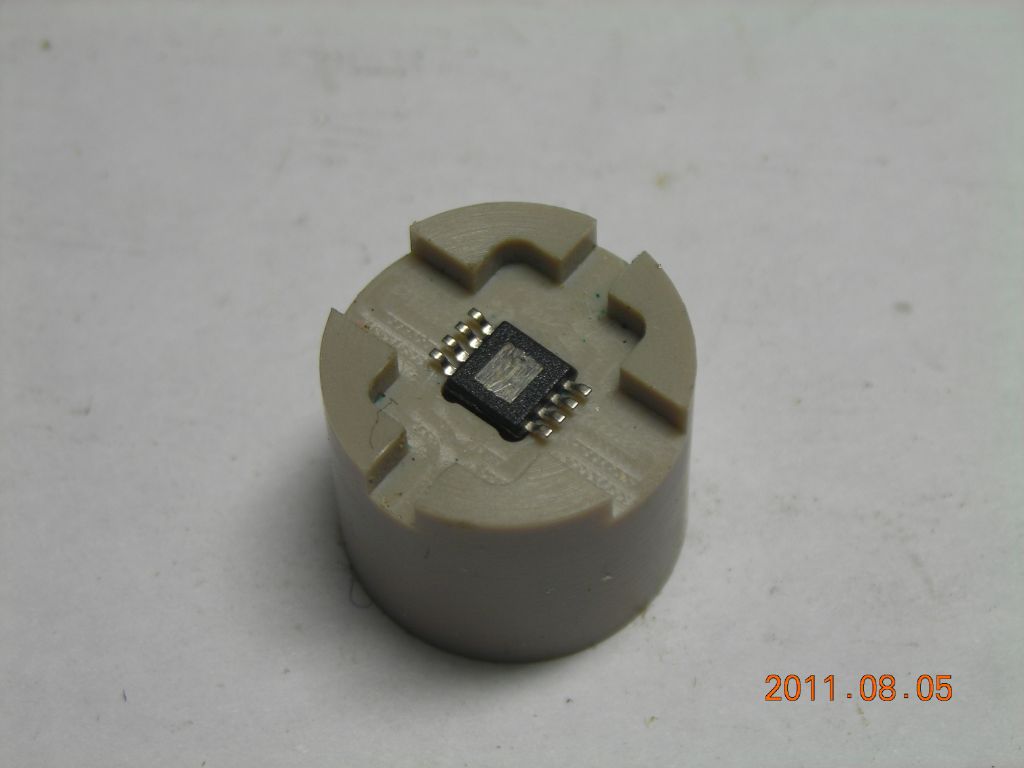 IC placed bottom-up in holder and blob of solder applied (not shown) |
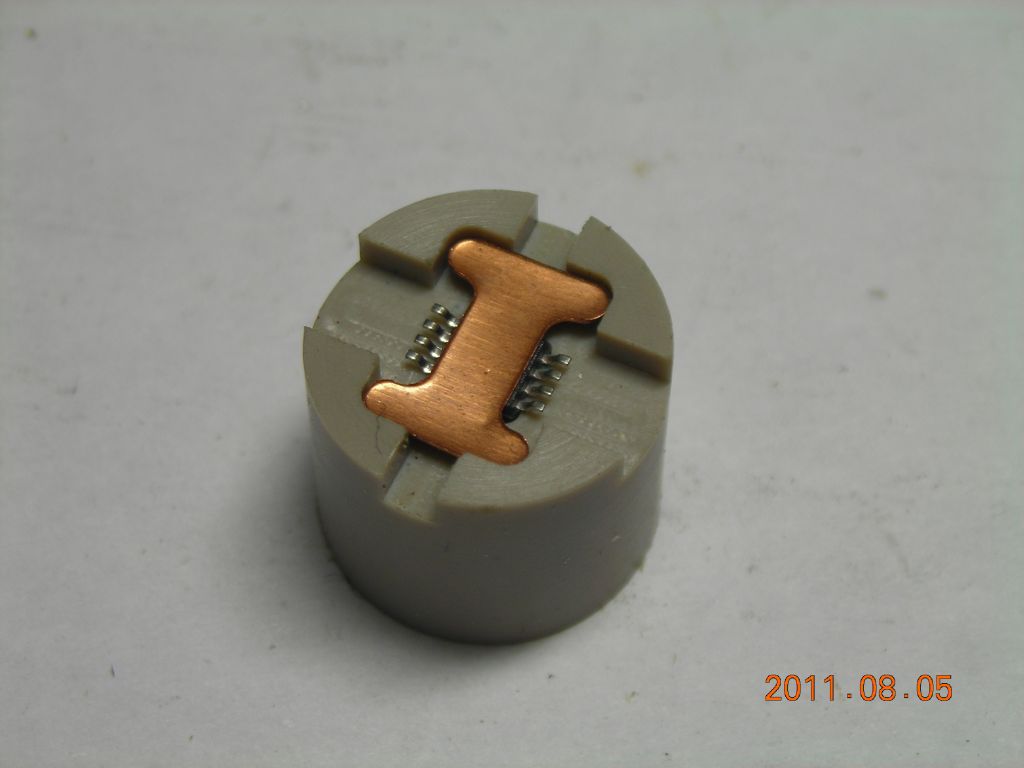 Heatsink placed on top and soldered through |
 Another view |
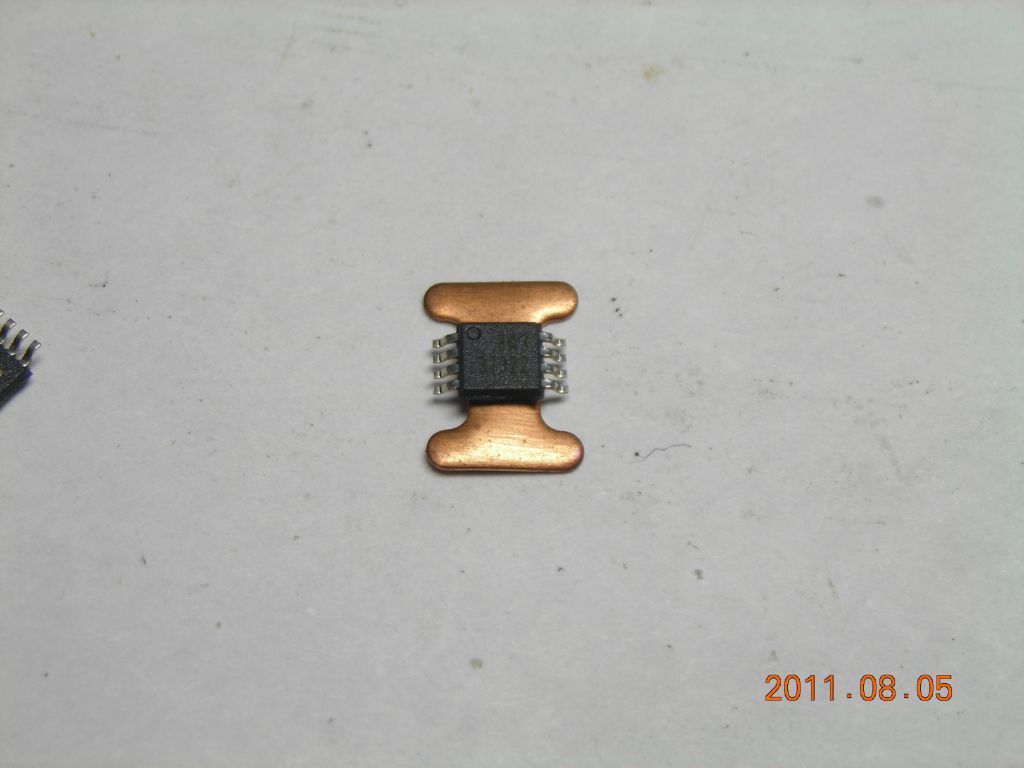 Finished IC with heatsink attached |
 IC and heatsink soldered to PCB |
| ▲ Electronics |