
| ▲ Electronics |
Why, you may ask. Well, I once got a dozen or so rotary switches very cheap, but unfortunately they're all 4-pole 3-way, which is not really much use for most things. I'd prefer either 1-pole 12-way or 2-pole 6-way. Fortunately, it's possible to modify the switch innards so it behaves as another configuration.
The photos should be reasonably self-explanatory. Once disassembled, you can see the four spring contacts on the rotor arm. Also, note the contact configuration on the rear cover - see the four central contacts? To convert to a 1-pole 12-way switch: remove all but one of the spring contacts on the rotor, remove the rotation stop washer to allow complete rotatation, and wire together the four central contacts on the rear cover externally.
 Original switch |
 Rear view - the four central contacts should be wired together for 1-pole 12-way operation. |
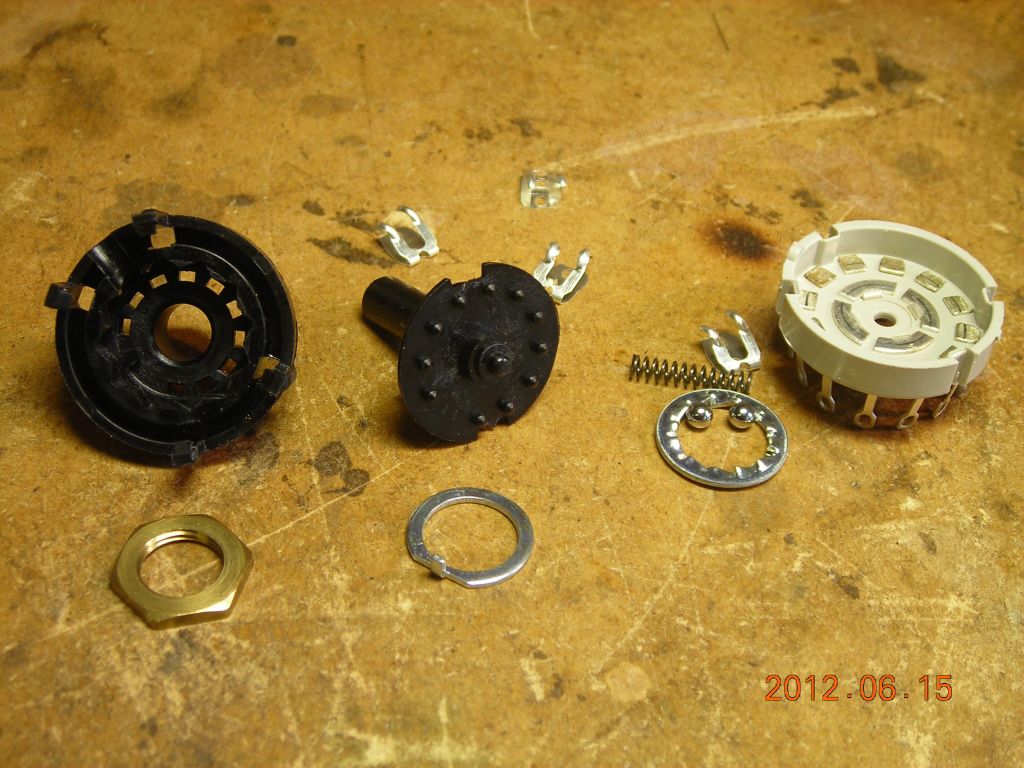 Disassembled - watch out for the spring and ball bearings! |
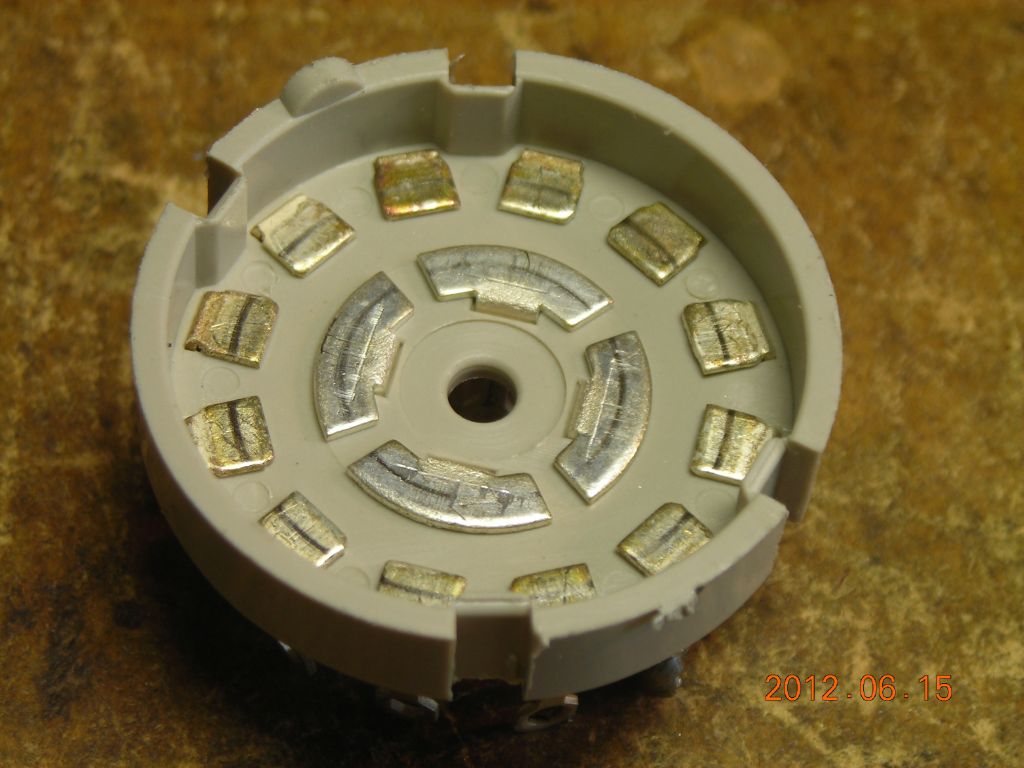 Rear contacts |
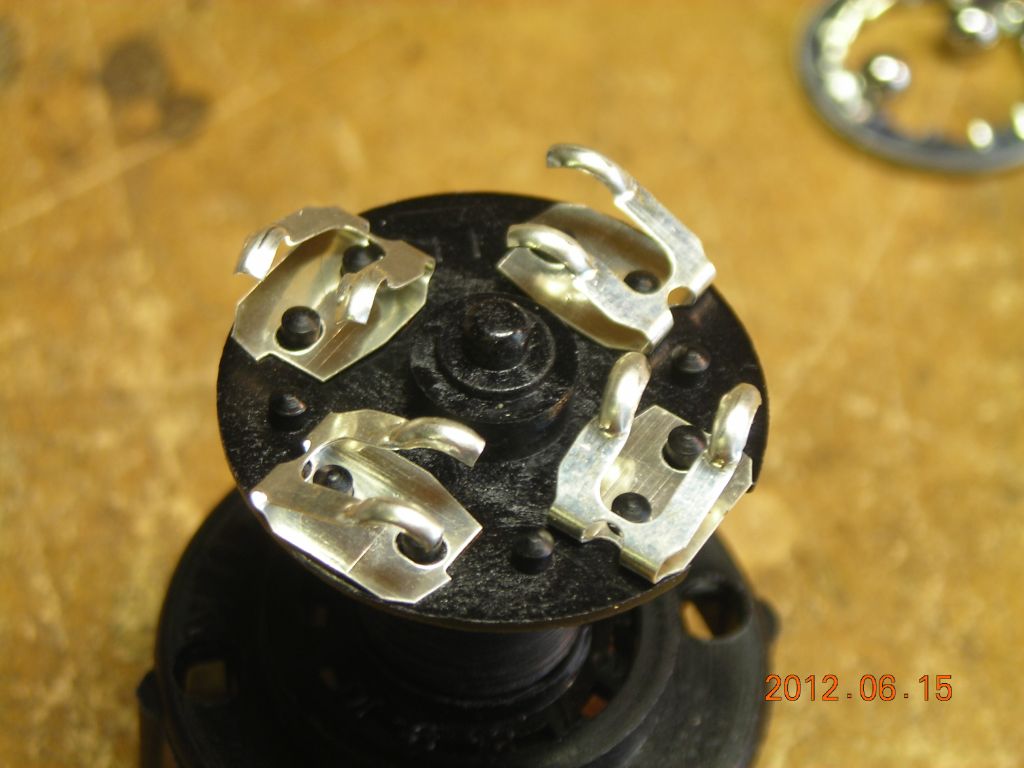 Spring contacts on the rotor - these just lift off. |
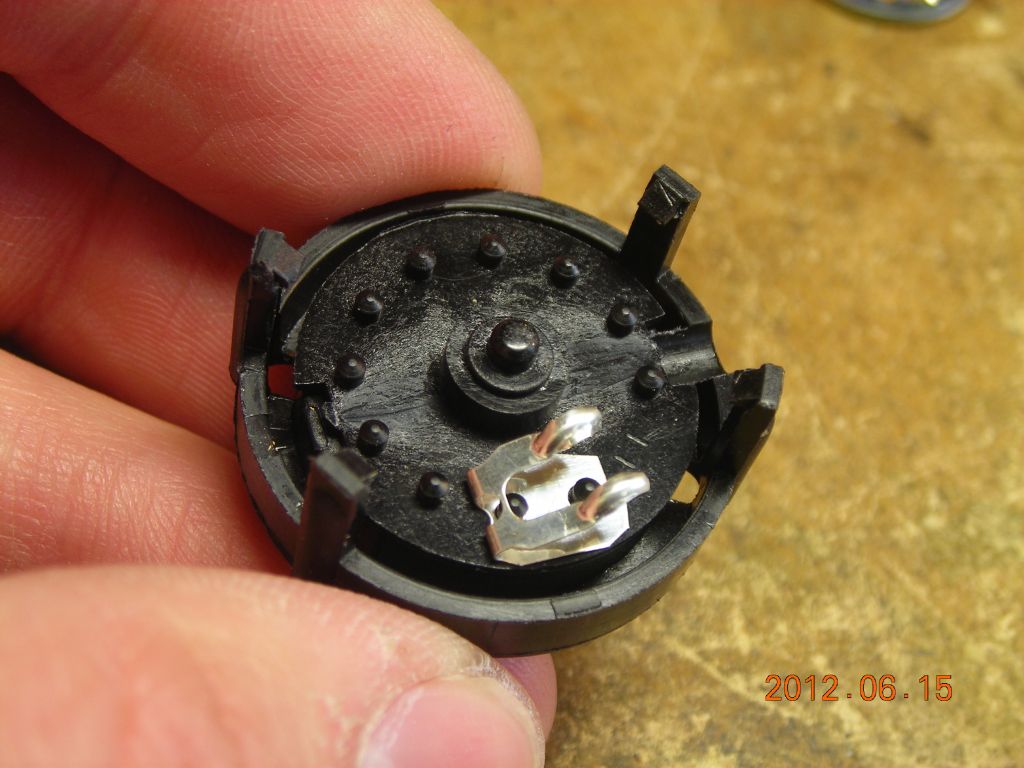
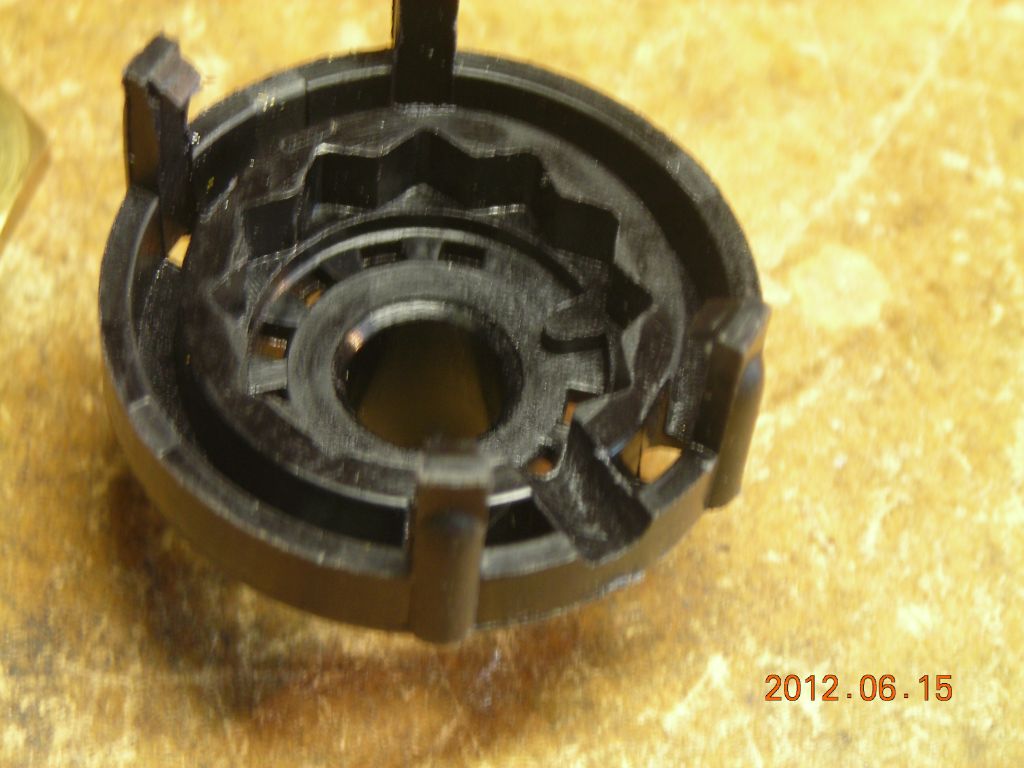 Detents inside housing. Note the small groove at the bottom-right of the photo - this is to aid re-insertion of the spring and ball bearings. |
 All but one of the contacts removed |
 Switch reassembled and the rotation stop washer removed (it has a little tag which sticks into one of the 12 little holes to limit the rotation of the arm) |
| ▲ Electronics |