
| ▲ Workshop |
For a much better software solution, please see my new page Webcam crosshairs using Processing.
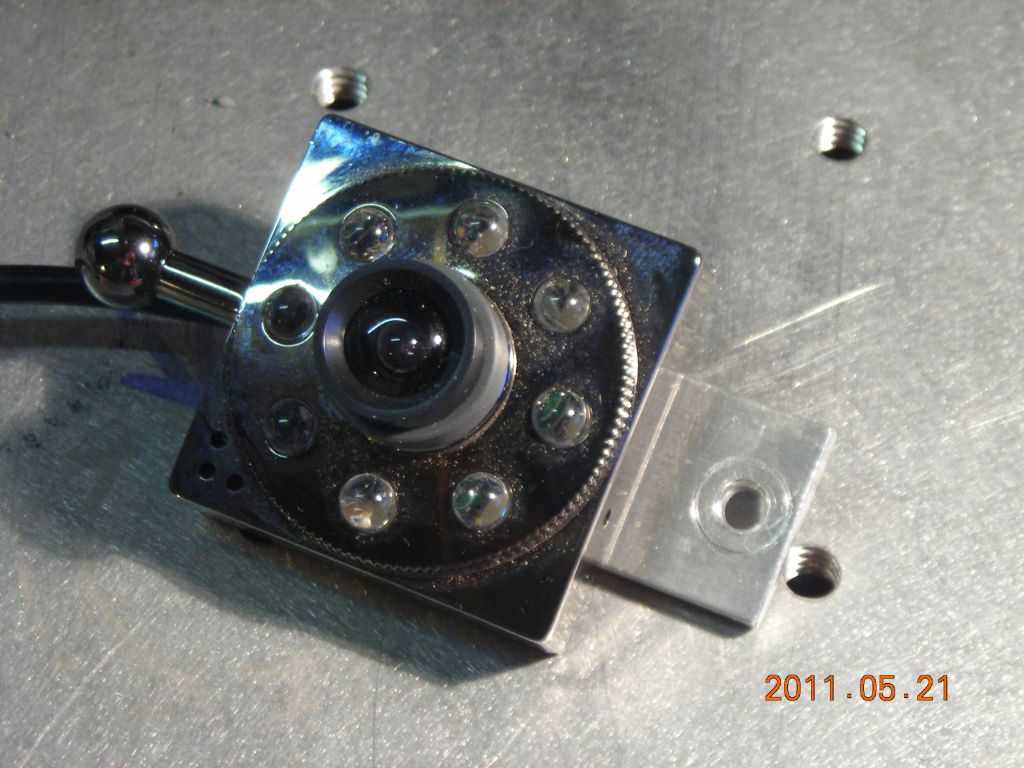
When I was experimenting with automatic CNC drilling of PCBs, I needed some way of accurately aligning the machine to the origin of the circuit board. Lots of people use cheap webcams mounted on the spindle to center in on parts, so I decided to lash one up.
The hardware part was easy. I got a webcam off EBay which said it had a metal body (turned out it did actually). A few screws mounted it to the underside of the Z axis (vertical axis) on the router. I set the lens so it focuses at about 3cm distance.
The software part of things was not so easy. I currently use Mach2 to control the router. Mach3 does have the capability to display a webcam feed, but this feature is absent from Mach2, and I didn't want to mess up a working setup by upgrading to Mach3. There is an existing piece of software called CentreCam which can display crosshairs on top of a webcam feed, but I thought the software was a bit clunky and not very flexible. So, I decided to have a go at writing my own.
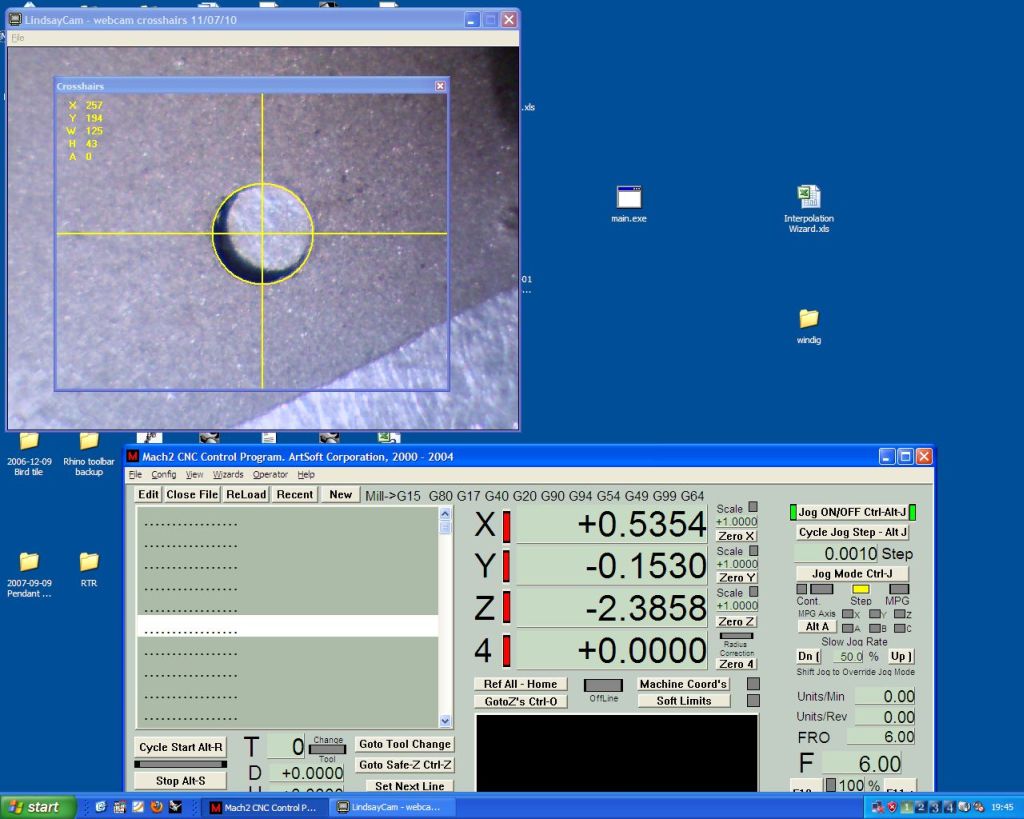
I thought it would be a simple matter to get a webcam feed into a VB6 form and overlay crosshairs, but it was far from simple. There are hardly any simple ways of doing this - most involve miles of code to grab video directly through Windows, which I couldn't be bothered with. Fortunately there is an ActiveX control called ezVidCap (http://www.shrinkwrapvb.com/ezvidcap.htm) which, although old, is very easy to use. However, this only lets you get a video feed into the form - there is no way of overlaying graphics directly on the video. The solution I came up with was to use a second form placed on top of the video. The second form has the crosshairs etc drawn on it, but its background is transparent, so you can see the video through it. I know it's perhaps a rather perverse way of doing it, but it's a hell of a lot easier than trying to do a direct overlay on the video feed.
And here's the result. VB6 source code here, and the installer program here. The main menu options are pretty self-explanatory. Video format and Video source let you adjust all the webcam settings as you would normally. Resize to fit video does what it says, although I find you have to choose it several times for the window to resize properly.
Once you show and then pin the crosshairs window, there are a whole list of keys which are active within the crosshairs window. These are detailled in the readme.txt file in both the above ZIP archives. There is a choice of eight different crosshair patterns, any colour of crosshairs you like, and full control over crosshair thickness, size, position, and rotation. Just play around with the keys and see what you can do!
Although the crosshairs window displays numbers showing the crosshair position, size etc., I wouldn't attempt to try using the crosshairs window to actually measure the dimensions of parts. The webcam gives a slightly distorted image. Instead, keep the crosshairs in one place and move the webcam using the router to measure dimensions.
What I normally do when I'm using the webcam is to have it running on a separate computer (e.g. laptop) from the one controlling the CNC router. It saves inadvertently messing up the crosshairs when switching windows.
 |
 |
 |
 |
I since discovered a better way of getting a webcam feed into VB6 in a way which makes it possible to draw directly on the frame - see here for more details.
| ▲ Workshop |